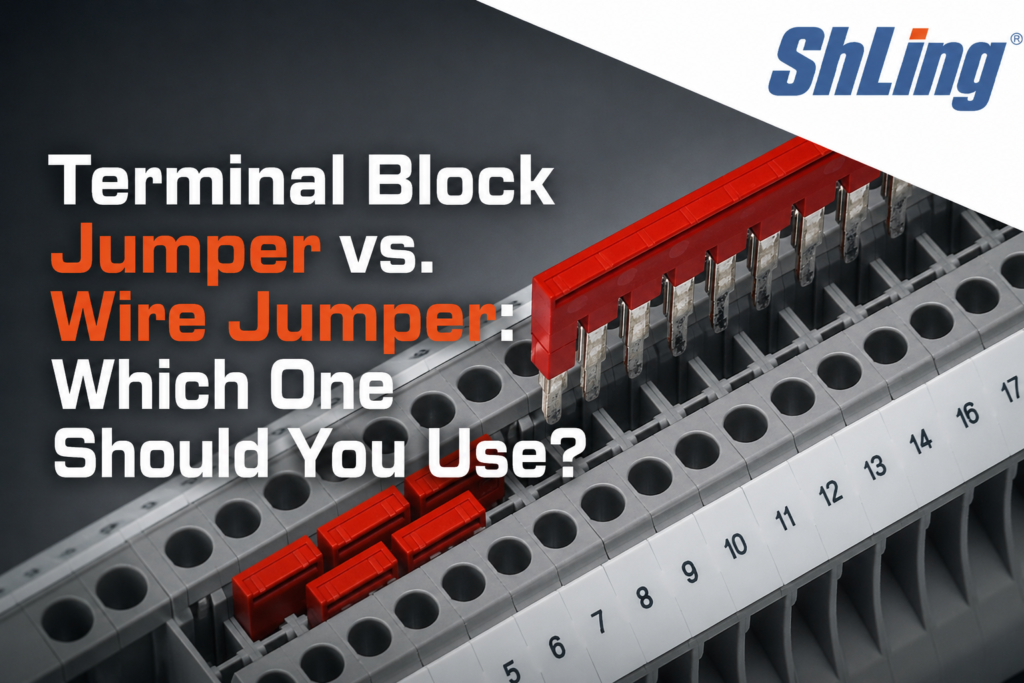
Two terminal blocks need the same 24 VDC. You can bridge them with a factory-made shorting bar, or you can loop a short piece of wire between the screws. Both put the same voltage on both terminals. The difference shows up later — in heat rise under load, in how long the install takes, and in what a maintenance tech sees when the panel is opened at 2 a.m.
This is one of the most common questions in control-panel assembly, and the honest answer is that neither method wins outright. Each is right in a different situation. This guide breaks down what each jumper actually is, when to reach for which, and the selection factors that matter on a real DIN rail.
What is a terminal block jumper?
A terminal block jumper — also called a shorting bar, a comb, or a jumper bar — is a conductive accessory made to fit one specific terminal block family. It presses into the jumper slot on top of each block and connects several adjacent terminals in a single motion. Factory jumpers are typically tin-plated copper bars, pre-insulated or fitted with a carrier that holds the contact pins at the block’s pitch.
Because the bar is cut to match the block family, it lands every terminal at the same position in the same pass. Factory jumpers are designed for specific terminal block families, but their allowable current should always be verified from the manufacturer’s accessory specifications rather than assumed to equal the block’s rating. If you need to skip a terminal — say, a fused terminal sitting in the middle of a common run — some bars can be notched to leave that position unconnected, while others cannot. Always follow the terminal block manufacturer’s instructions before modifying a jumper.
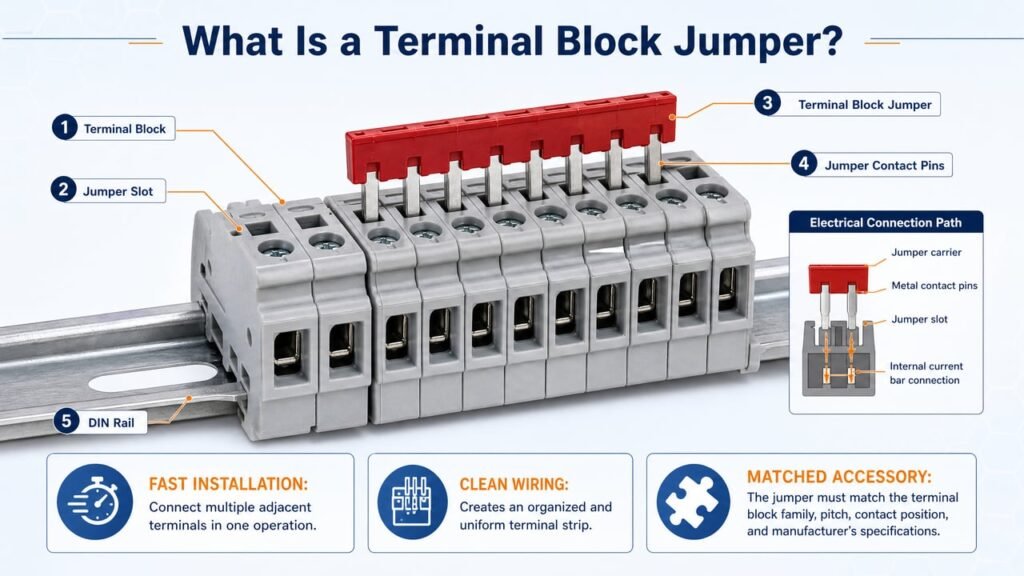
Figure 1. A factory-made terminal block jumper (comb / shorting bar) installed across adjacent DIN rail terminal blocks.
What is a wire jumper?
A wire jumper is exactly what it sounds like: a short conductor that you run from one terminal screw to the next, daisy-chaining the run by hand. It can be a bare bridge, a ferrule-terminated lead, or a pre-fabricated plug-in jumper with insulated ends. The material is the same wire you are already wiring the panel with, so it needs no special inventory.
A wire jumper is the flexible option. It works across mixed block families, across different pitches, in layouts interrupted by fused terminals (provided the protective path is not bypassed), or between terminals that are far apart on the rail — situations where no factory comb fits.
Head-to-head: terminal block jumper vs. wire jumper
| Terminal block jumper (shorting bar) | Wire jumper | |
| Current rating | Confirm the manufacturer’s accessory rating | Limited to the wire gauge you choose |
| Installation speed | One insertion bridges several terminals | One connection per terminal, screw by screw |
| Compatibility | Must match the exact block family and pitch | More flexible across compatible terminal types |
| Skipping terminals | Use a manufacturer-approved skip/segmented jumper where available | Just leave that terminal unconnected |
| Look on the rail | Clean, uniform, factory finish | Visible; can be tidy or messy |
| Re-configuration | Comb must be replaced | Rework the wires |
| Mixed block types | Not possible | Recommended |
| Fault risk | Low if properly seated | Loose screws and undersized wire are common failure points |
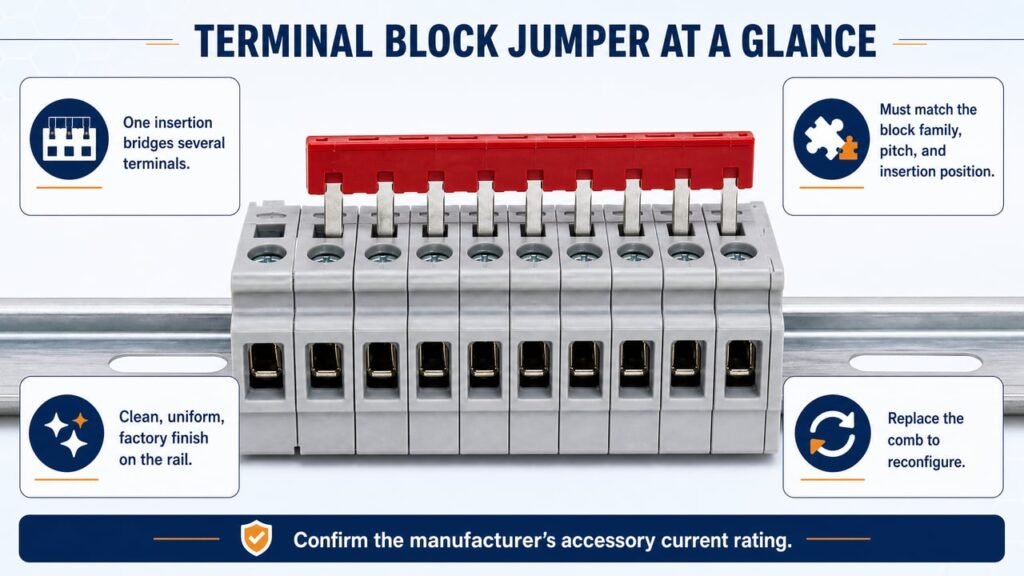
Figure 2. A terminal block jumper at a glance: speed, compatibility, appearance, reconfiguration, and mixed terminal types.
When to reach for a shorting bar
Use a terminal block jumper when you are distributing a common line across a run of identical, adjacent blocks. The classic cases are +24 VDC commons, 0 V returns, and shared signal references for sensors, relays, and I/O modules. The bar turns a repetitive wiring job into a single push, keeps the front of the rail clean, and leaves no ambiguity about which terminals are common. Plug-in comb jumpers also typically reduce repetitive wire terminations and labeling compared with individual wire jumpers.
For the same reason, a comb is the field-preferred answer whenever the run is contiguous and unbroken by fuses or a mixed block family. [Internal link → DIN rail terminal blocks]
When a wire jumper is the better call
A wire jumper wins when the common run is interrupted or non-uniform.
The most common cases:
• A fused terminal sits inside the run and must stay out of the common bus.
• The run mixes block families or pitches, so no single comb fits.
• Only two or three scattered terminals share a node, and a comb would be wasted.
• The panel standard or client spec routes jumpers through the wire duct.
In these situations, matching the jumper to the circuit matters more than anything else. Size each wire-jumper segment for the maximum current it is expected to carry — considering the combined downstream load, the upstream protection, and the terminal rating — rather than simply mirroring the branch wire. Use the same ferrule as the rest of the run, and ideally the same color as the node, so the jumper visually disappears into the wiring. [Internal link → pre-insulated wire jumpers]
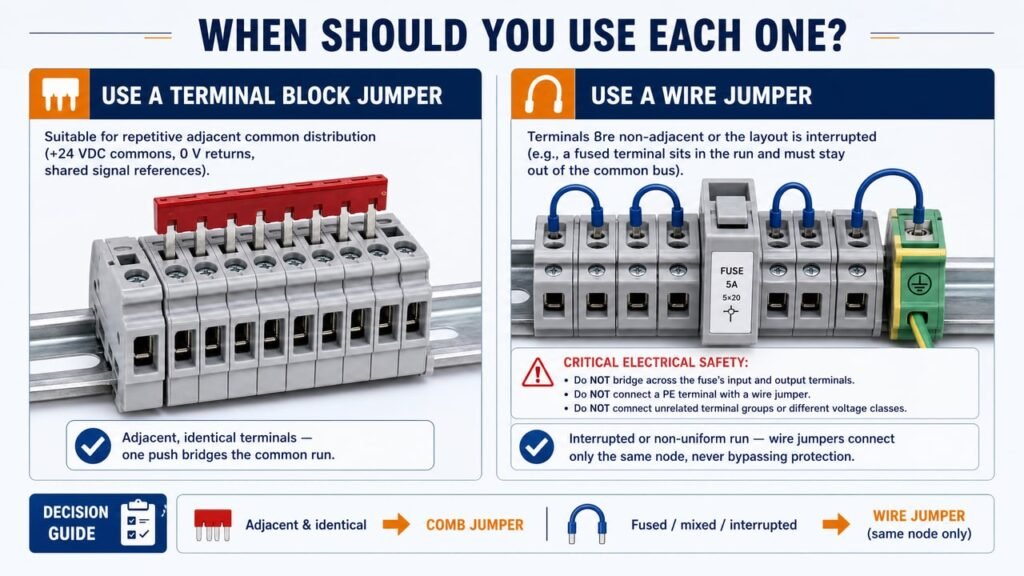
Figure 3. When to use a terminal block jumper, with a quick visual decision guide.
Current rating. Size each wire-jumper segment for the maximum current it can carry, based on the circuit topology, downstream loads, upstream protection, and terminal rating. An undersized wire jumper is the quiet cause of many “warm terminal” service calls — a segment can end up carrying far more than its share of the node’s current.
Compatibility. A shorting bar is only as good as the fit. It must match the terminal block family, the pitch, and the insertion position. Using a bar meant for another brand is a common way to get a loose, intermittent common.
Five factors that decide it
Standards and workmanship. In practice, neither the NEC nor NFPA 79 prescribes a jumper’s shape; what codes do require is a workmanlike installation — conductors identified, protected, and grouped sensibly — so always verify the edition of the standard adopted in your jurisdiction. Two rules hold regardless: jumpers cannot bridge between voltage classes, and work on energized terminals sits under NFPA 70E. Finger-safe (IP20) blocks and a transparent cover over the strip are the two common ways panels keep incidental contact from happening in the first place.
Maintenance and labeling. Identification and documentation requirements depend on the applicable panel standard, customer specification, and local rules, so confirm what applies to your build. As a general rule, keep every jumper traceable to the electrical drawing. A comb adds almost no labeling burden; a daisy-chained run needs only the home-run supply tagged, because every visible conductor is the same node; a duct-routed jumper, by contrast, makes each segment a separate conductor that typically needs tagging at both ends — clean front face, but a longer reverse-engineering job for the next technician.
Fuses and mixed blocks. If the run includes a fuse, decide whether the fuse sits in the common path or not. Fuse not in the common path: a notched comb skips the fused terminal. Fuse in the common path: never bridge across the fuse’s input and output terminals — that bypasses its protection entirely. Keep the protected and unprotected sides electrically separated, and follow the circuit design and the terminal block manufacturer’s bridging instructions.
A quick decision guide
Adjacent, identical terminals, no fuse in the run → shorting bar
• Fuse in the run but not in the common path → notched shorting bar
• Fuse in the common path → keep the protected and unprotected sides separate; never bridge across the fuse
• Mixed block families or pitches → wire jumper
• Frequent re-configuration expected → wire jumper (or plug-in jumpers)
• Clean front face is a client requirement → shorting bar
Common mistakes that turn a jumper into a fault point
The smallest component in the panel causes some of its most confusing failures, usually for these reasons:
• Undersized wire jumper. Voltage drop under load, warm terminals, intermittent trips.
• Wrong shorting bar. A bar meant for another block family sits proud of the slot and makes intermittent contact.
• Mixed colors in one node. A common bus that is half red, half gray is a puzzle every time someone troubleshoots it. Pick one color per node and keep it.
• Skipped torque. Loose termination screws are the most common field failure in jumpered runs. Verify with a calibrated torque driver.
Before you close the panel — with the circuit de-energized and absence of voltage verified — check continuity across the common bus end to end, confirm the routing against the drawing, and photograph the finished run. A standard continuity reading only shows basic continuity; where contact resistance matters, use an appropriate low-resistance measurement method. And that photo is worth more than any label when a machine stops months later.
FAQ
Can a wire jumper carry as much current as a shorting bar? Only if you size the wire for the combined load. A factory shorting bar is designed for the block family, but always confirm its allowable current from the manufacturer’s accessory specification; a wire jumper is only as good as its gauge, ferrule, and termination.
Can I cut a shorting bar to length? Some bars are designed to be cut or modified to skip positions, while others are not. Always follow the terminal block manufacturer’s instructions before cutting or removing teeth, and mark where the tines actually seat so any cut lands cleanly.
Do jumpers need to be documented? Documentation depends on the applicable panel standard and customer specification. As a general rule, a comb adds almost no labeling burden, while wire jumpers are conductors that need to stay traceable — a duct-routed segment typically gets a tag at both ends, and a daisy-chained run at least needs the home-run supply tagged.
Can I bridge between voltage classes? No. Jumpers tie together terminals of the same node only. Voltage classes must stay physically segregated in the panel.
Choose the terminal block jumper that fits the run, not the habit
The shorting bar and the wire jumper do the same job and fail for different reasons. On a clean, contiguous run of identical blocks, a shorting bar is faster, neater, and harder to get wrong. On a broken or mixed run, a wire jumper is often the more practical option. Decide by reading the rail, not by what you used last time — and before you order, confirm the shorting bar matches your terminal block family and the required current rating.
Not sure which jumper matches your terminal block? Send us the terminal block series, pitch, pole count, and required current — our team will help confirm a compatible jumper configuration.